Share:
Just like batch cooking, batch editing a group of images at once can save you a lot of time.
Photoshop also offers a handy automated feature called batch editing, to play out actions across any open images in Photoshop at the same time.
Batch editing allows you to apply the same edits to a group of photos all at once (instead of individually), which can be a huge time-saver if you're working with a large number of images. In addition to saving time, batch editing can also help to ensure consistency between your photos.
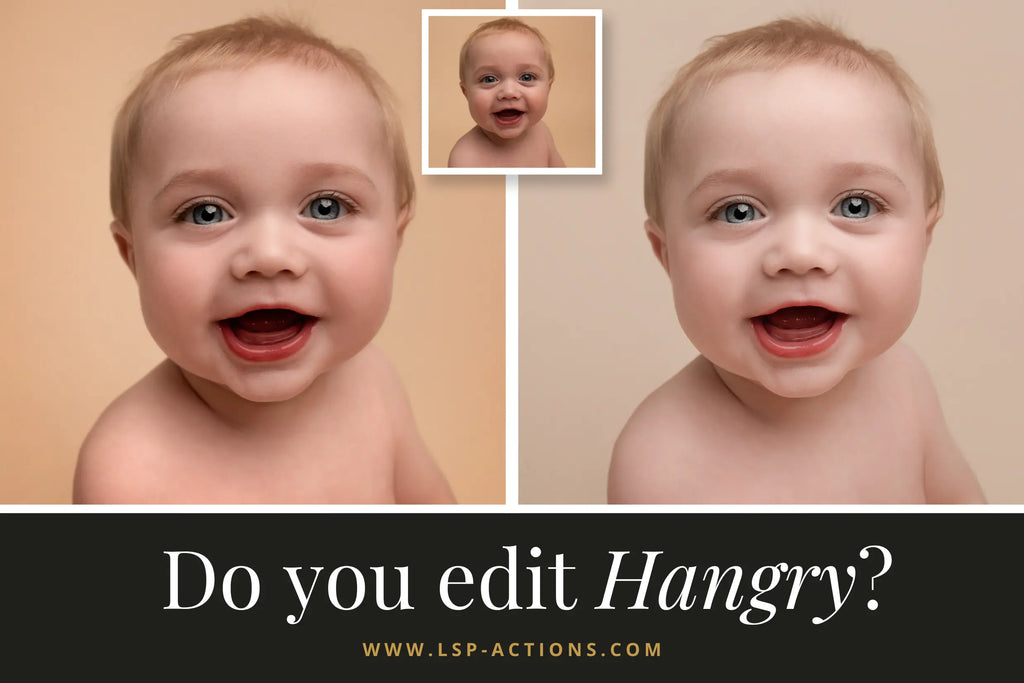
For example, if you're editing a set of newborn baby photos, you can use batch editing to apply the same color correction and exposure adjustments to all of the images you have open in Photoshop. Even the same skin fix actions, though you'll need to paint these on individually, but that's just a few clicks really and still a huge time saver.
As a result, your photos will have a cohesive look and feel because you've applied the exact same editing steps at the exact same time! Super fast, really easy and you can do it as often as you need.

How to batch photoshop actions to edit multiple images at the same time
It's so easy it is to batch photoshop actions across open images at the same time for a consistent and fast edit. Check out the 3 minute video tutorial below. Or scroll down for the step-by-step instructions
Tutorial by: Lauren at LSP
Image credit: Kristen at K Artocin Photography
Actions Used: LSP Cake Smash Cutie Photoshop Action Bundle
STEP 1: Open photoshop and select the images you want to edit.
To batch edit in Photoshop, first open the program and select the images you want to edit. I recommend groups of 5 photos at a time.
STEP 2: Open the batch dialogue window.
Next, click on the "File" > "Automate" > "Batch
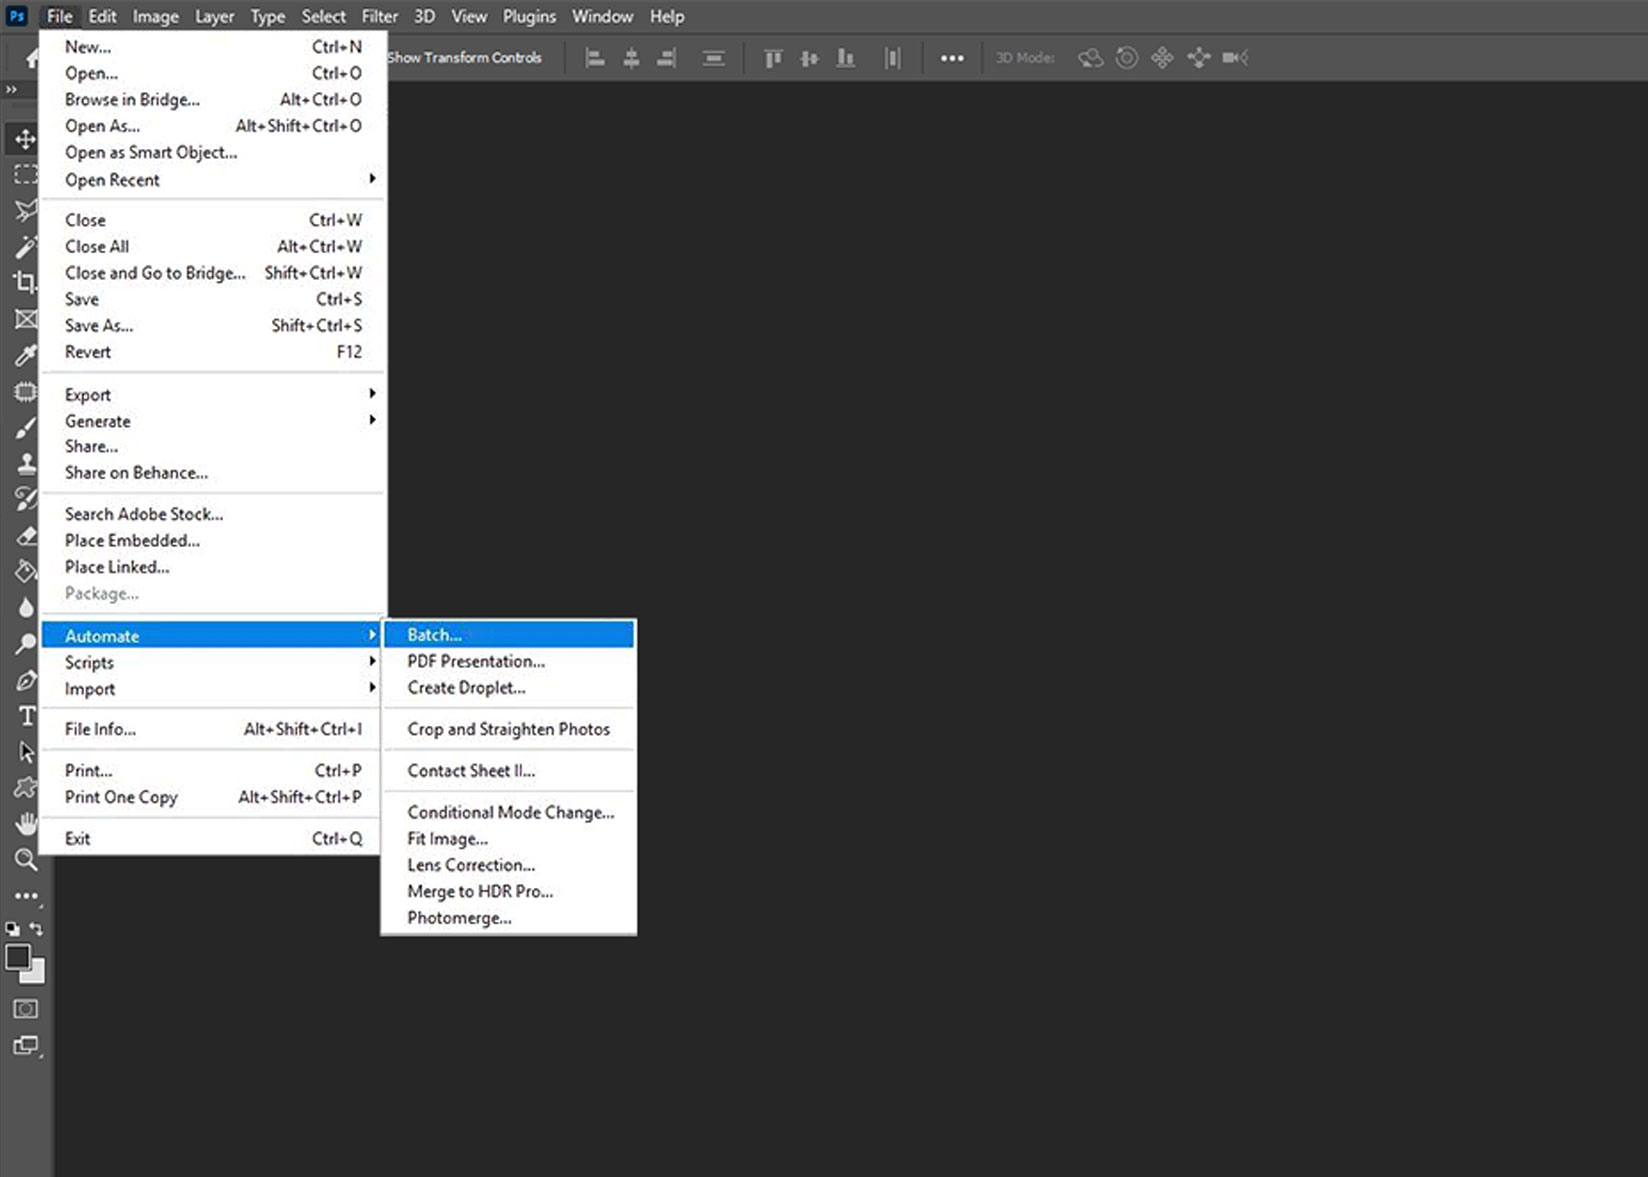
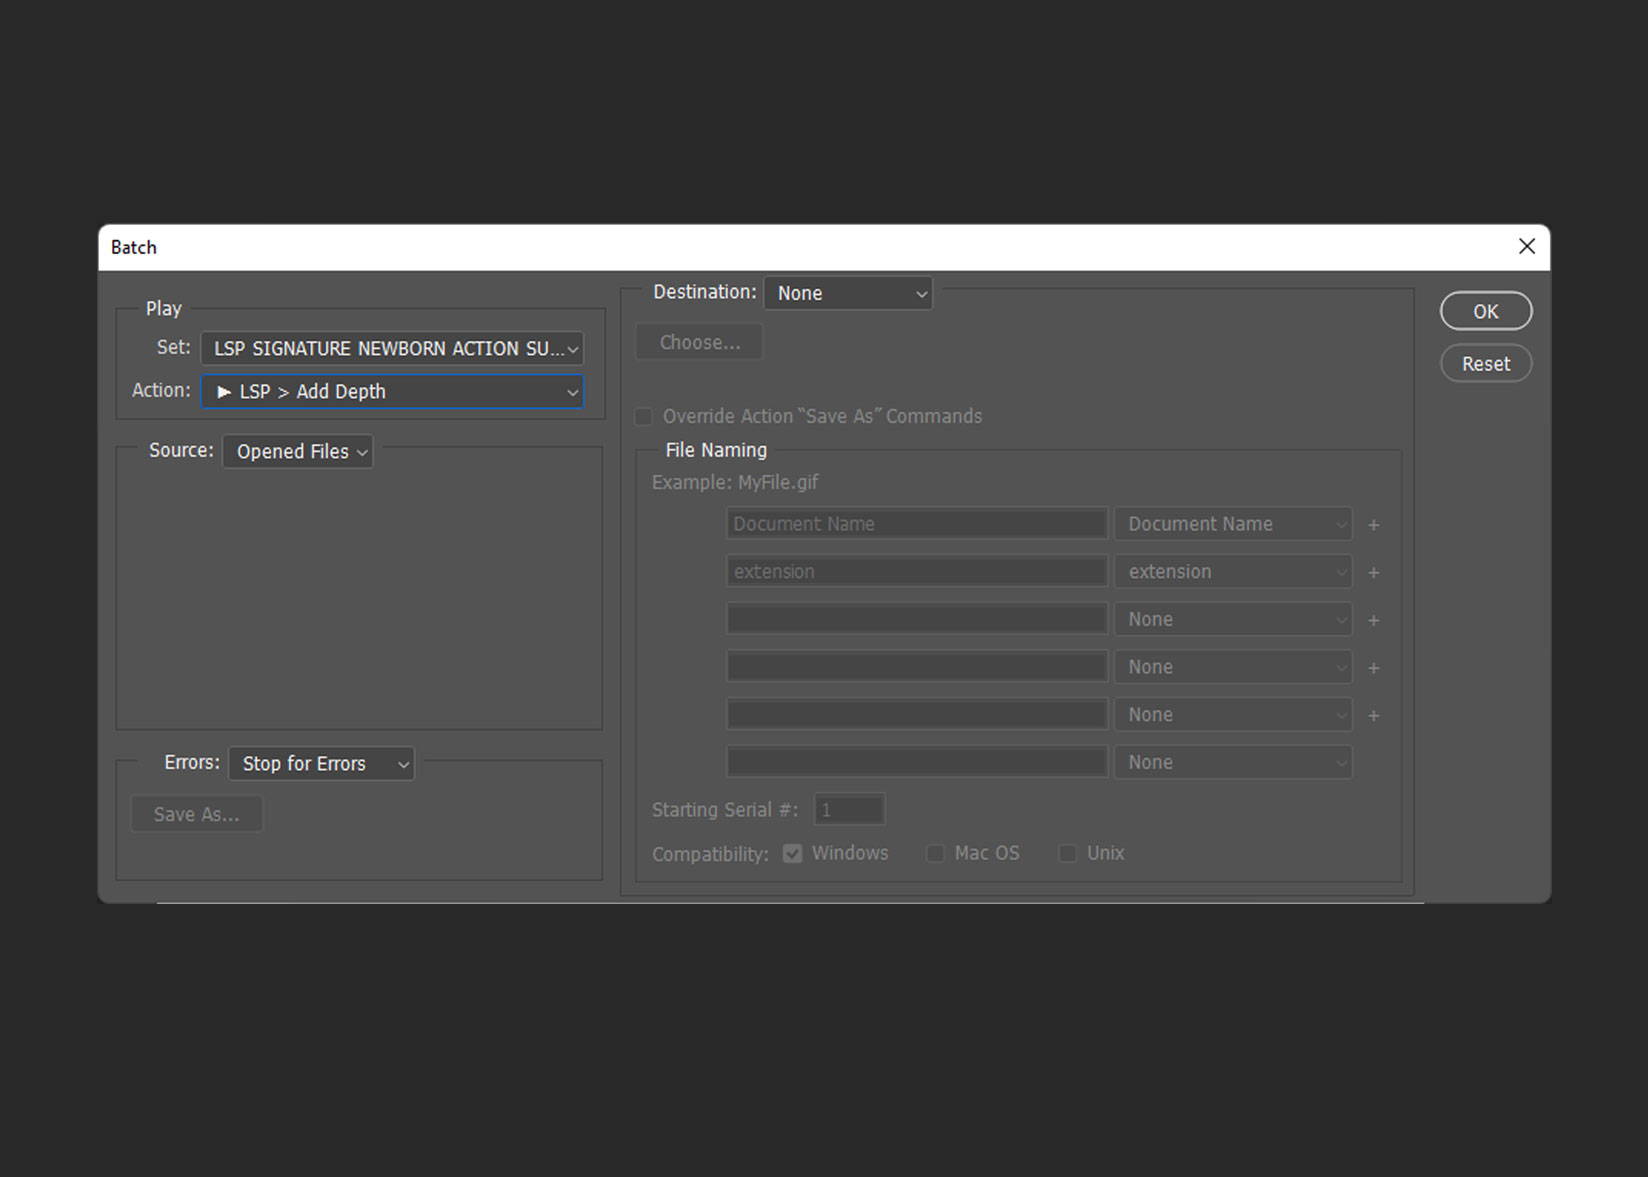
STEP 3: From the batch window, choose the action you want to play over the open files.
Choose the action set (i.e. LSP Signature Newborn Photoshop Actions) and then the specific action you'd like to play out (i.e. Add Depth).
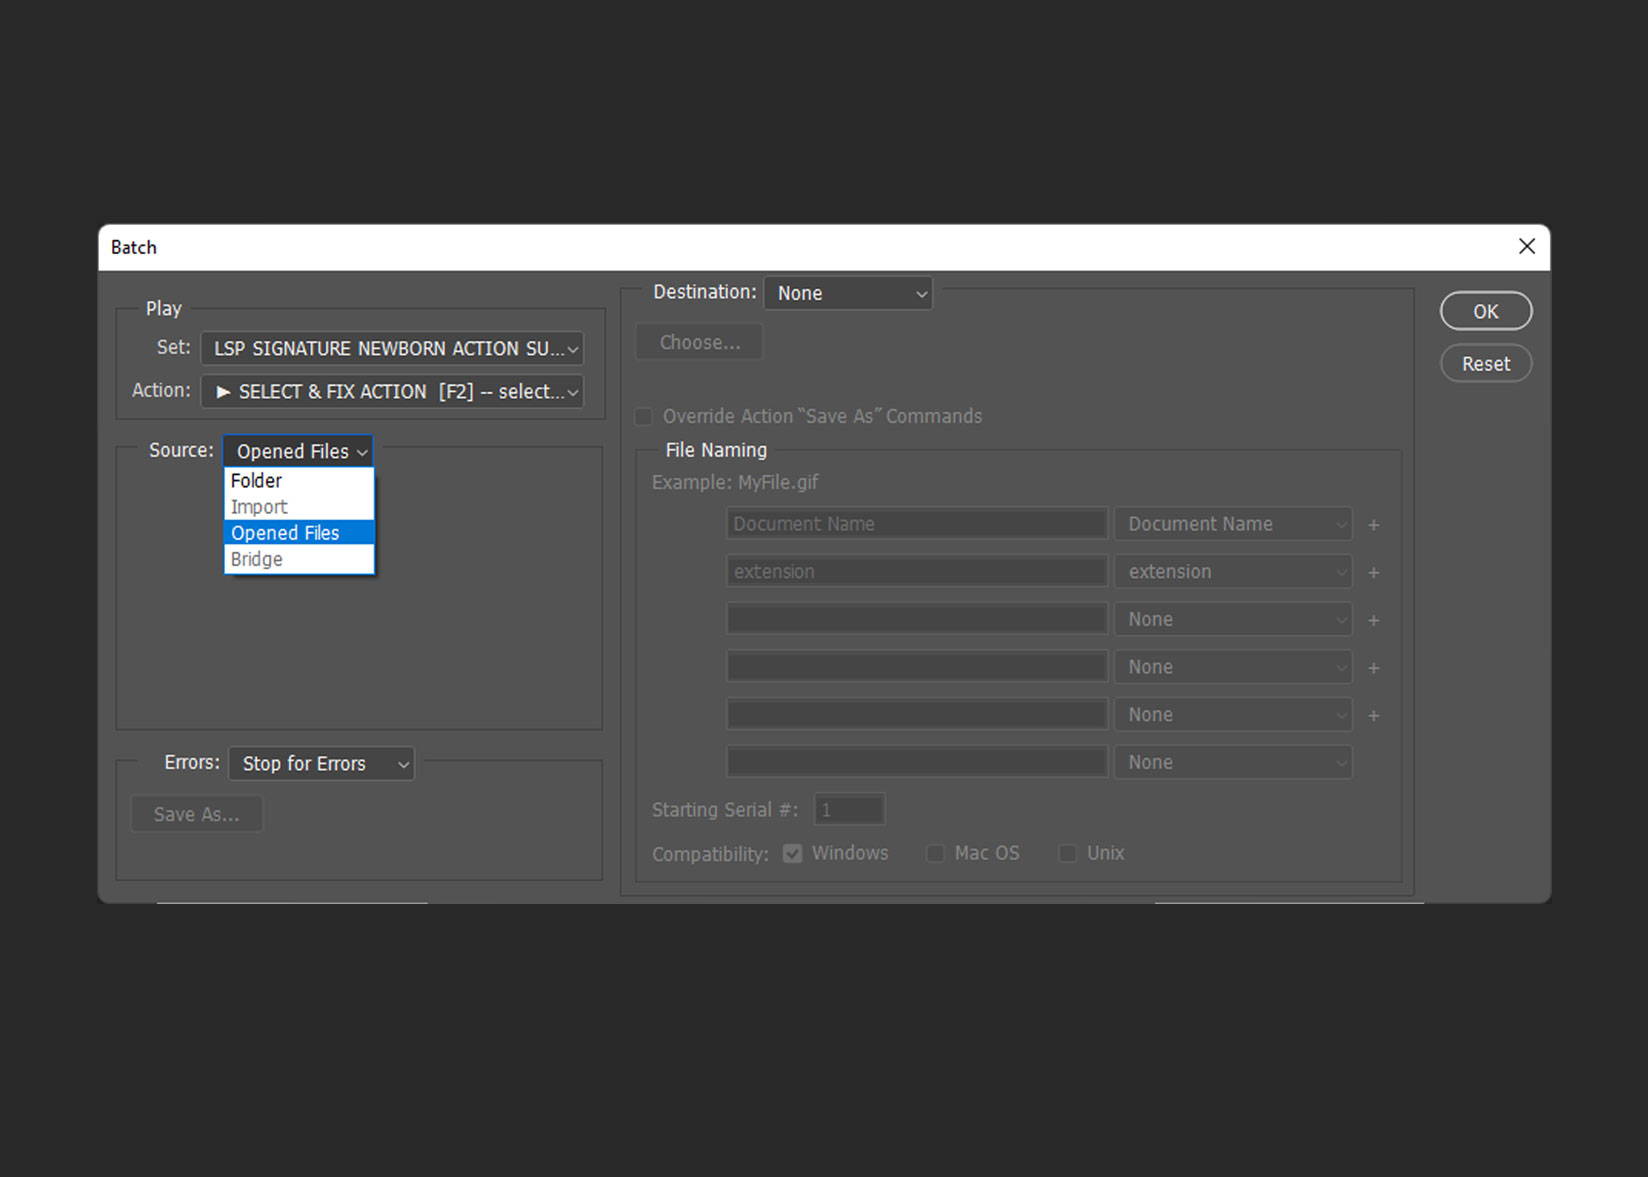
STEP 4: Check The Source Setting
Make sure the Source option is set to "Opened Files". You can click the dropdown to change if needed.
STEP 5: Stop for Errors?
I personally like to choose "log errors to file" as this ensures a smooth process. But if you would prefer Photoshop stop to let you know of any problems, choose Stop for Errors. This will halt the editing process until you can check.
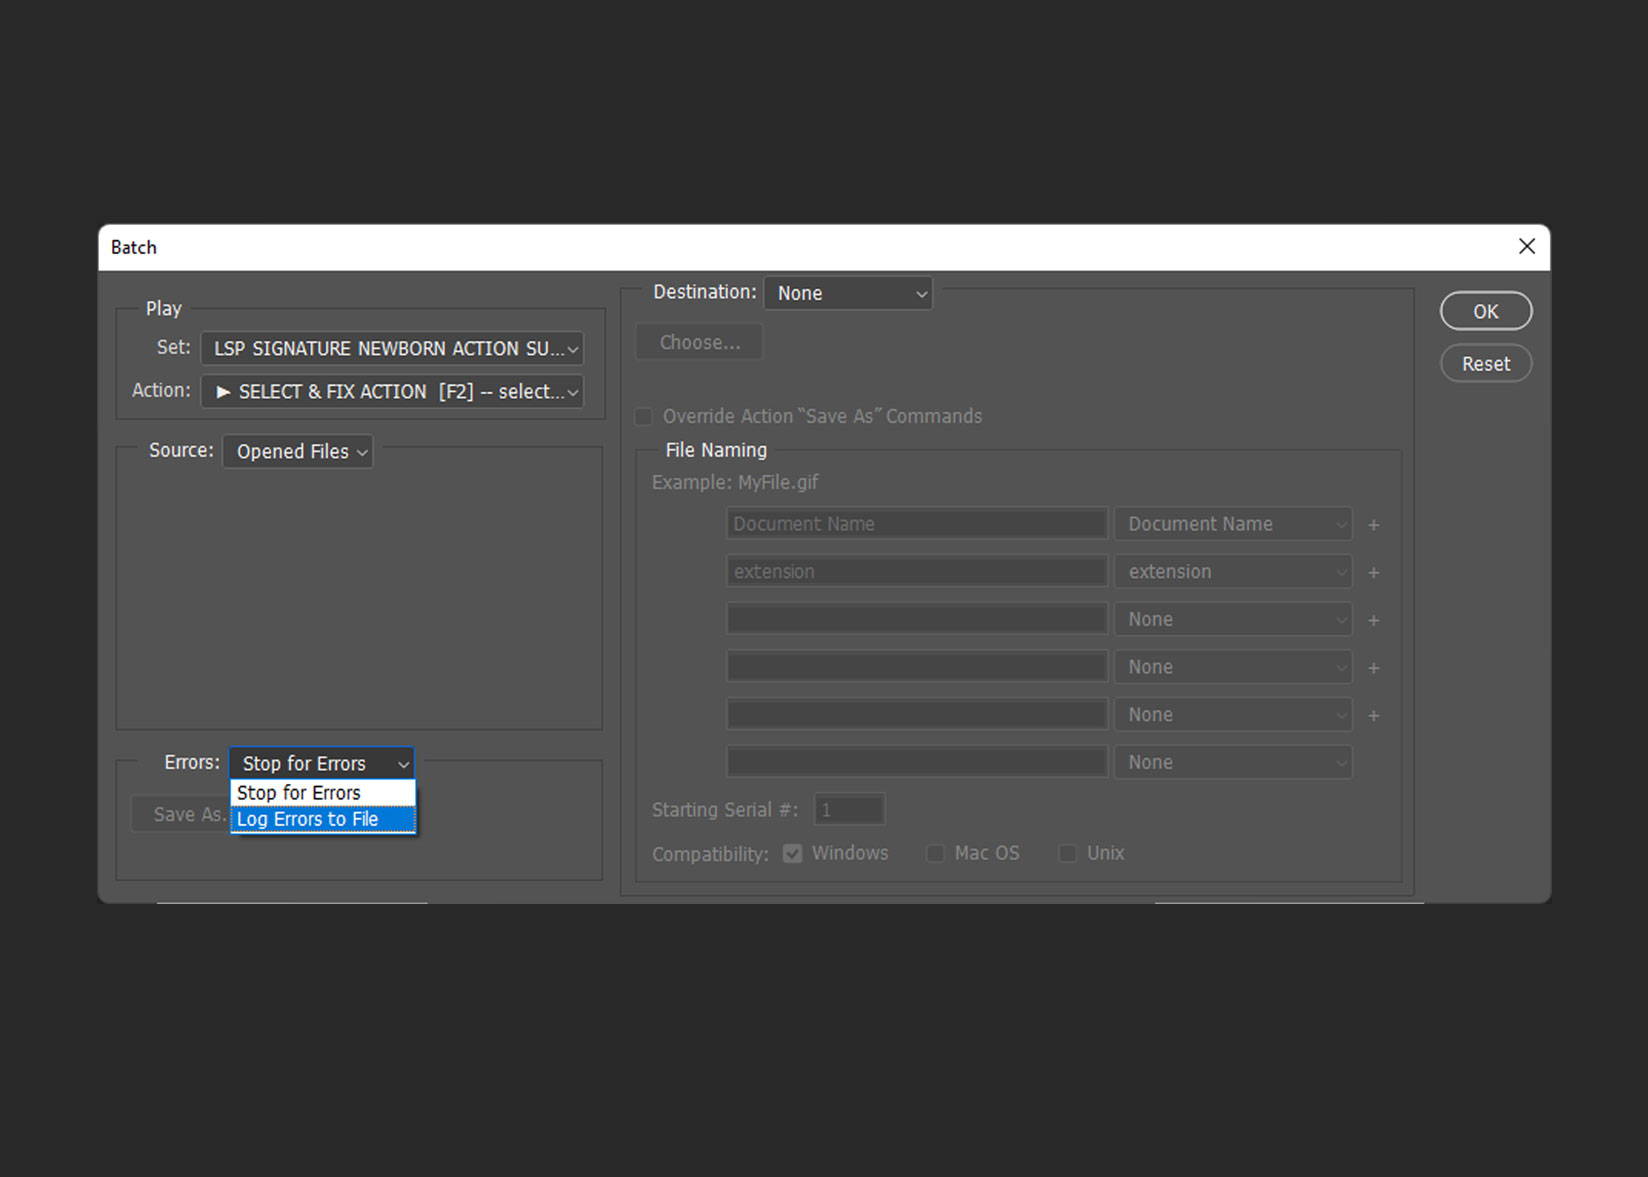
STEP 6: Destination
Unless you are playing an action such as LSP Save and close, or LSP Frame resize and close then you'll want to choose Destination: None. This will just play out the editing steps over your image then stop. So you can continue editing.

STEP 7: Hit OK to batch the action over all open images
And that's it! Hit OK and watch the action magically play out over all open files in Photoshop whilst you sit back and sip your coffee.

Batch editing is a great way to speed up your workflow and improve the quality of your photos. By using lsp actions, you can easily batch edit your photos in Photoshop. This can save you time and ensure that your photos look consistent no matter what time of day you're editing at.
So if you're looking for an easy way to improve your photos, be sure to check out batch editing!
Have you tried batch editing in photoshop? Let me know in the comments how it went for you.
Hi I'm Lauren
Award winning Photographer & editing tutor (plus a mother to to 4 spirited young kids)
I created a suite of editing tools for busy photographers who want to transform their images and supercharge their editing. Find out more about these photoshop actions, presets and overlays here.
Save this for later or share


